Background
This post shows how to implement a much needed (IMHO) Approve User component to Scuttle.
Shortly after I deployed my scuttle instance I started getting lots of new users. A little investigation found that spammers like this type of service to post links to and then refer people to those links. One of the main reasons being that they can bookmark a link such as http://spam.com/a-big-spam-page.html) and then pass on the link to the bookmark which looks like a legit link (most people would know http://spam.com/a-big-spam-page.html is spam and not go to the site but pointing someone to http://bookmarks.adercon.com/drad/ where they see a set of links may trick some people into believing it is a more legit site.
Needless to say, spammers like the site/feature that scuttle offers and were signing up in droves. My first few attempts were to blacklist spammers. This approach works well but requires a lot of management as you need to add email addresses or domains to a list. Upon signing up that list is consulted, if the new user has an email listed in the blocked list they are not allowed to create a new account. Works well, but most spammers simply get another email account…and its not feasible to block all @yahoo.com email address domains. This is where my second attempt came in (re: Removing Spam Accounts). It also works well, a little easier to manage but still a lot of work.
The first two attempts leverage work/patches provided through the scuttle forum, which were helpful but didn’t address my issues completely, which lead to the current approach - the Approve User component.
The Goal
As mentioned above, the goal is to add an Approve User component to Scuttle. This component still allows any user to request a new account; however, the user is not automatically granted an account but rather a request is submitted for a new account. The scuttle admin will receive the request and can then approve or reject the new account. If the new user’s account is approved, the new user is allowed access to the scuttle application and can then act like a normal scuttle user.
Implementing this component does require working with code (php) in several files but the process is not overly complicated and most who are willing / able to set up their own scuttle instance should have no problem deploying the mods for this feature.
Notice: I’ve updated this post (2011-04-10) to add in “User’s Registration IP Address”
Details
The Approve User component leverages the Admin Interface, more specific, the Removing Spam Accounts mod so please perform this task first.
The following list provides a brief overview of the changes needed to implement the Approve User component, refer to the link for each item for details on how to implement each task:
- admin.php
- add an approve and unapprove case to the $action switch which handles the approve/unapprove web requests
- send the notification to the new user upon approval
- add the approveUser and unapproveUser functions which carry out the approve/unapprove web request
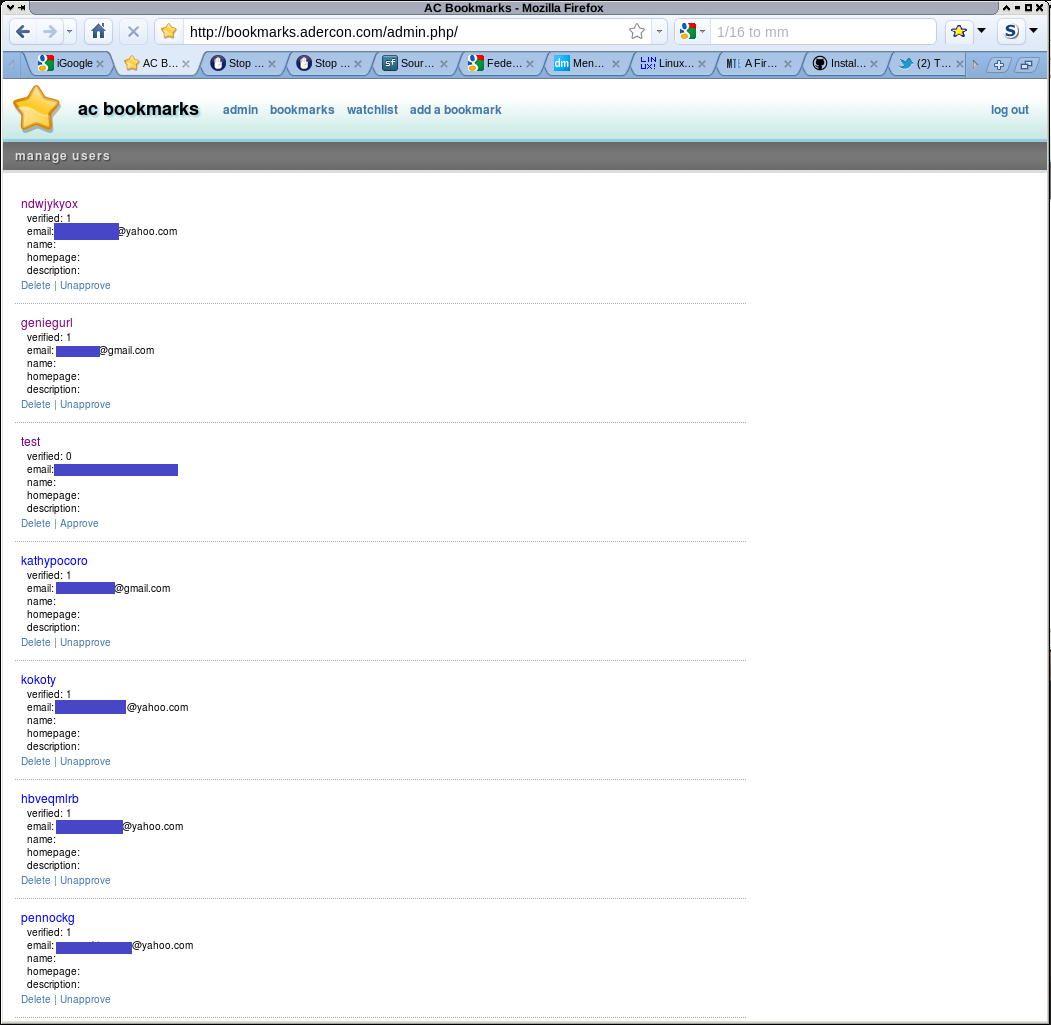
- customize the ‘manage users’ view/template that displays each user in the admin.php page (add the verified text and Approve / Unapprove links
- notify site admin of new user request
- add the xVerified column to the table
Add Verified Column to Users Table
Issue the following SQL on your Scuttle database or add the equivalent column through your GUI DB editor of choice to add the ‘Verified’ column to the user’s table:
| |
Set Admin User Account to ‘Verified’
Issue the following SQL on your Scuttle database to ‘approve’/verify your ‘admin’ user. This will allow the admin user to log in after you’ve implemented the Approve User component but all other users will not be allowed to log in until you have approved them.
Note: if you have other user’s you wish to verify in bulk you can easily change the SQL below to approve other user’s.
| |
note: admin user is typically uId=1, please double check on your instance
If you would like to approve a set of users simply use and IN() such as:
| |
Getting New User’s IP/Domain
As a new user signs up the scuttle admin will be notified via email. The user enters in a Username and Email address which is sent to the admin but it is often necessary to have the user’s IP address and/or domain. This allows you to check the IP/domain to ensure it is not a recognized spammers IP or domain. To add this functionality, add the following code to your register.php file near the top (I put it after $completed = FALSE;):
| |
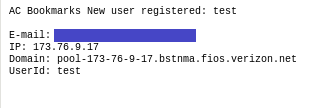
Email Site Admin of New User Request
This step notifies the site admin of the New User request. To add the functionality, add the following code to your register.php file inside the elseif ($userservice->addUser($posteduser, $_POST['password'], $postedmail,$ip)) { which is inside the if (!$completed) { which is inside the if ($_POST['submitted']) {, add the following code (I added it just before the ‘Your application has been submitted…’ message):
| |
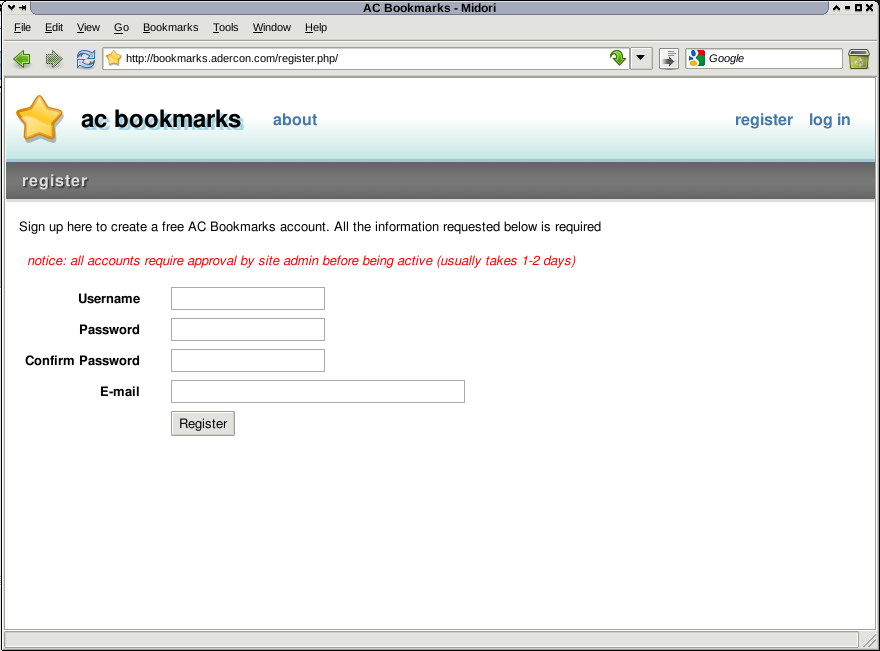
Notice: I also modified the templates/register.tpl.php file and added a notice that all accounts require approval by site admin. I’d suggesting adding something to the page to let users know their account will not be active immediately and it lets spammers know there are more stringent rules in place on your site.
Customize Manage Users Template
In order for the site admin to be able to approve or unapprove users we need to modify the Manage Users template. Open the templates/userlist.tpl.php file and add the following code (note: I’ve added the full code for the <div class='link'> and <div class='meta'> so you can replace these two divs and all contents completely or customize as you see fit):
echo '<div class='link'>';
echo '<a href=''.createURL('profile',$users[$key][$userservice->getFieldname('username')]).''>'.$users[$key][$userservice->getFieldName('username')].'</a>';
echo ' <br/>&nbsp;&nbsp;verified: '.$users[$key][$userservice->getFieldname('verified')].'';
echo ' <br/>&nbsp;&nbsp;email: '.$users[$key][$userservice->getFieldname('email')].'';
echo ' <br/>&nbsp;&nbsp;name: '.$users[$key][$userservice->getFieldname('name')].'';
echo ' <br/>&nbsp;&nbsp;homepage: '.$users[$key][$userservice->getFieldname('homepage')].'';
echo ' <br/>&nbsp;&nbsp;description: '.$users[$key][$userservice->getFieldname('description')].'';
echo '</div>';
echo '<div class='meta'>';
echo '<a<br />href=''.createURL('admin','delete/'.$users[$key][$userservice->getFieldname('username')]).''onclick='return confirm(\''.T_('Are you sure?').'\');'>'.T_('Delete').'</a>';
echo '&nbsp;|&nbsp;';if ( $users[$key][$userservice->getFieldname('verified')] == 0 ) {
echo '<a<br />href=''.createURL('admin','approve/'.$users[$key][$userservice->getFieldname('username')]).'' onclick='return confirm(\''.T_('Are you sure?').'\');'>'.T_('Approve').'</a>'; } else {
echo '<a<br />href=''.createURL('admin','unapprove/'.$users[$key][$userservice->getFieldname('username')]).'' onclick='return confirm(\''.T_('Are you sure?').'\');'>'.T_('Unapprove').'</a>'; }
echo '</div>';
Disallow Unapproved Users Login
In order for the entire Approve User component to work we must require all user’s be ‘approved’ before letting them log in. To accomplish this, open the services/userservice.php file and modify the login function. The $query should be as follows:
| |
Add Approved/Unapproved User Functions
The approve/unapprove user functions handle the web request and actually perform the approve user/unapprove user call to the database. To implement the two functions open the services/userservice.php file and add the two functions:
| |
Add Approve/Unapprove User Handlers
The approve/unapprove user handlers initiate the web request which calls the approve/unapprove user functions. To implement the two handlers open the admin.php file and the following two ‘case’ statements to the switch ( $action) {:
case 'unapprove':
    if ( $user && ($userinfo = $userservice->getUserByUsername($user)) ) {
        $uId = $userinfo['uId'];
        $unapvd=$userservice->unapproveUser($uId);
        $tplVars['msg'] = sprintf(T_('User %s has been unapproved.'), $user);
    } else {
        echo('couldnt find user ('.$user.'), attempting lookup...');
        $userinfo = $userservice->getUserByUsername($user);
        $uId = $userinfo['uId'];
        echo('uId=['.$uId.']');
    }
    break;
case 'approve':
    if ( $user && ($userinfo = $userservice->getUserByUsername($user)) ) {
        $uId = $userinfo['uId'];
        $apvd=$userservice->approveUser($uId);
        $tplVars['msg'] = sprintf(T_('User %s has been approved.'), $user);
        //send user email saying their account has been approved.
        $userEmail = $userinfo['email'];
        $message = 'Your registration has been approved. Please take this time to update your profile with your website and other info.';
        $message .= '';
        $message .= 'We do not sell or redistribute your information in any form; however, it is useful if we need to contact you.';
        $message .= '';
        $message .= 'If you have any issues or concerns please contact the site admin ('.$adminemail.')';
        $message .= '';
        $message .= 'Thank you and welcome to AC Bookmarks!';
        $message = wordwrap($message, 70);
        $headers = 'From: '. $adminemail;
        $mail = mail($userEmail, sprintf(T_('%s Registeration Approved %s'),$sitename,$posteduser),$message, $headers);
    } else {
        echo('couldnt find user ('.$user.'), attempting lookup...');
        $userinfo = $userservice->getUserByUsername($user);
        $uId = $userinfo['uId'];
        echo('uId=['.$uId.']');
    }
    break;
Send Approved Notification to New User
After the admin ‘approves’ a new user we want to notify the new user that their account has been approved. This has already been set for you in the Add Approve/Unapprove User Handlers, in specific, see the ‘approve’ case. You can customize the message to your liking.
Capture User’s Registeration IP Address
It is also useful to capture the user’s registration IP address for spam checking/reporting. This step is an easy task as the IP address of the user from registration is already captured (see above). To store this information you need to make the following changes (note: this is a high-level summary, if you need more details write in the comments):
- Add the Database Column (xRegisteredFromIP)
- alter table sc_users, add column: xRegisteredFromIP, VARCHA(20), default 0, nullable, comment = Extension: contains the IP address with which the user registered from.
- Add registered IP to addUser function in services/userservice.php
- Add register IP (registeredip) to addUser function call in
register.php - Add IP to the
admin.phpfor displaying Registered IP addressecho ' <br/>&nbsp;&nbsp;<span title='IP address from which the user registered' >IP</span>:<br />'.$users[$key][$userservice->getFieldname('registeredip')].''; - Add registeredip to userService getFieldname
- this goes in the
var $fields = array(
- this goes in the
After you have implemented the above changes view your admin page and you will see the ‘IP’ column (note: user’s signed up prior to this change will not have an IP address shown).
Sample View
Manage Users Page
Register Page
Admin Notification Email
User Notification Email

Source Code
The following source files have been provided:
- the admin.php, services/userservice.php, templates/userlist.tpl.php, and register.php files
If you experience any issues or problems please contact us and we’ll get back to you!